Friday, January 25, 2013

Spiced Chocolate Balls


This is the last Sicilian cookie recipe for a while. Promise. I saved my favorite for last– spiced chocolate balls, or tetù. The dough is a fairly standard Sicilian recipe with the added eastern exoticism of cloves and new world chocolate.

As a child, Sicilian cookies were a much anticipated treat at my grandmother's house or her sister's, my great aunt Deda, especially during holidays. They always kept assorted collections in old shortbread cookie tins always lined with waxed paper. The lid would come off and the tin would be placed in the middle of the table with the pronouncement, "dui cookie" (2 cookies), a self-mocking, family joke, funny if only because it had been uttered thousands of times before, with the willful mash-up of English and mangled Italian that was stock-in-trade humor in my grandmother's extended family. I would stretch myself out to peer into the magic cornucopia of home baked biscotti and greedily extract all the tetù I could find. I would have to be quicker than my great uncle who shared a similar, obsessive preference for them. My great aunt Deda would look on with satisfied amusement at the one child and mild annoyance at the other.


I have a family recipe for these cookies, culled from a great aunt or second cousin. It's filled with margarine and other mid-century shortcuts and substitutions so I've chosen to use a very authentic recipe from Victoria Granof, a great chef and food stylist in New York City. Her book Sweet Sicily is the best compendium of the island's deserts in English.


Tetù

1 cup blanched whole almonds
4 cups unbleached all-purpose flour
2 ounces unsweetened chocolate
1 cup milk
1 1/2 cups sugar
1 teaspoon ground cloves
2 teaspoons baking soda
1/2 teaspoon salt
1 teaspoon vanilla
1 egg, lightly beaten

Glaze

2 cups sugar
1 1/2 cups water
12 ounces unsweetened chocolate, roughly chopped
2 cups powdered sugar


Toast the almonds in a large pan over medium heat, tossing or stirring until brown. Let cool and then blend in a food processor or coffee grinder. Put into a large bowl and mix in the flour.

In a medium saucepan, whisk the butter, chocolate and milk, over low heat until the butter is melted. Whisk in the sugar and then remove from the heat and let cool.

Whisk the cloves, baking soda, salt, vanilla, and egg into the butter mixture. Stir the liquid ingredients into the dry ingredients until just combined. Cover and chill the dough for at least an hour.

Preheat the oven to 375˚

Pinch or scoop out a tablespoon full of dough and roll it between your palms to form a ball. Arrange on a parchment lined cookie sheet, 2 inches apart.

Bake the cookies for 15 minutes, or until puffy but still slightly soft in the center. Cool the cookies for 10 minutes before removing from the pan.

Make the glaze: In a medium saucepan, bring the sugar and water to a boil, whisking constantly. Boil for 3 minutes, then remove from the heat and whisk in the chocolate until melted. Whisk in the powdered sugar until smooth.

While the cookies are still warm, dunk them in small batches in the warm glaze and then put them on a cooling rack with a baking sheet underneath to catch the drips. The cookies and glaze should both be warm so that the cookies soak up the glaze.

Let the cookies cool long enough to firm up and become quite dense and the glaze hardens properly.

Store in a used shortbread cookie tin lined with waxed paper and serve with the pronouncement, "dui cookie" spoken in a thick Italian accent.


Monday, January 7, 2013

Dead Raspberries


Wednesday, December 26, 2012

Scadalini


A Christmas or two ago, I did a post about the mother of all Sicilian cookies– Cuccidati. But I hinted at a cookie far more strange and wondrous, one that always fascinated me as a child– Ossa dei Morti or "Bones of the Dead." Of course, in that particularly Italian habit of having different names for the same thing, my family called them Scadalini. My first etymological instinct was for some Arab linguistic connection, as is often the case, especially in the southern parts of Sicily where my grandfather's ancestors are from. My sister, however, who speaks fluent Arabic, saw no such connection. And my guru of all food Sicilian, Mary Taylor Simeti, consulted with her experts in Palermo and informed me that they've never heard the word and can find no historical evidence of it. It turns out the most wondrous and mysterious thing about Scadalini starts with its name.

I've associated the Sicilian cookies that my grandmother and aunt made with Christmas simply because they were always part of our holiday meals, but Scadalini are actually cookies more specifically made around All Saints' Day and All Souls' Day– the Day of the Dead, or our Halloween. The reason for the name "Bones of the Dead" is obvious once the cookies are baked and cooled - the rigatoni shaped cylinder of dough oozes out its soft filling, leaving a crispy bone white shell intact. Essentially powdered sugar and anise, nothing could be simpler (or stranger.)


Scadalini

This recipe comes from my Aunt Lena who learned from her mother Rosa (my great grandmother, or "Big Nana.") We always called her Big Nana so as to distinguish her from my grandmother (just Nana), but in ironic fact she was all of four feet six inches tall. Rosa emigrated from a small fishing town in southern Sicily in the early 1900's. She was all of 9 and had informed her older brother in New York that she would be accompanying his fiance and to please send her a one-way ticket for the ship, thank you very much. Leaving her parents and home at the age of 9 should tell you all you need to know about the towering will and determination of my diminutive great grandmother. She spoke no English and was therefore a distant and imposing figure in my childhood, but my father remembers living in outright terror of her.

A few things to keep in mind with this recipe– the dough resembles pasta dough more than cookie dough and the rolled and cut raw cookies need to sit over night to form a dry crust on top. Other than that, these are fairly simple affairs.


2 pounds powdered sugar (2 boxes)
1 pound flour (Aunt Lena measured it in an empty sugar box)
4 teaspoons baking powder
4 tablespoons fennel seeds (lightly toasted and ground)
3 eggs
water as needed

Combine all the dry ingredients in a very large bowl and whisk about to thoroughly mix. Beat the eggs in a small bowl and then mix into the dry ingredients. Add water a little at a time until the dough resembles pasta dough. Test it by rolling a small amount into a 3/4 rope, like you're making gnocchi– it should just hold together. Kneading helps to bind it all together.

Once you've got the dough to the right consistency, take a small hunk and roll it out as above, into a 3/4 inch rope and then cut with a knife or pastry srcaper into 1 1/2 inch pieces. Arrange the cookies on a hard surface or cookie sheets (if you have a lot) and let them sit overnight or at least 12 hours to form a hard crust. The bottoms will remain moist and this is how the dough escapes the shell during baking.

Preheat the oven to 275˚

When ready to bake, place the cookies on a parchment lined cookie sheet, 2 inches apart (approximately 12 cookies per sheet) and bake for 35-40 minutes or until the tops start to golden.

Let them dry completely and get crunchy before eating many with a piping hot espresso.

Monday, October 15, 2012

Studio Carta for Martha Stewart


After being postponed once or twice, my first work for Martha Stewart Living is finally out and on the newsstands. The November issue has my story about Brookline bookbinder Angela Liguri and her sunny little shop, Studio Carta. We had a great day shooting and talking about Rome (her home town and my favorite city). I can't thank her enough and everybody in the Martha Stewart Photo department.


Tuesday, April 17, 2012

Personal Spaces for Improper Bostonian


Wednesday, February 29, 2012

Area Four


 The latest issue of Boston Magazine is on the news stands with my pictures from Area Four, Michael Leviton's latest restaurant in Technology Square. I'm ashamed to say that I hadn't been there prior to the photo shoot, but one bite into the mac and cheese and I realized what a truly grave error that had been.

I should back up a moment and say that the thought of dining out when you have a one-year old and a three-year old is fraught with trepidation and anxiety. Gone are the days of romantic evenings and fine dining. Those childless dates are replaced with a new set of values in restaurant dining – fast, kid-friendly and ultimately, almost unavoidably, mediocre. Fast-forward back to Michael Leviton's mac and cheese. Here was a place with amazing adult food that I could also imagine my girls tucking right into. In fact I text-messaged the wife and told her to pack up the daughters and meet me at A4 for dinner that night. Do I need to say it was a huge success and a delicious time was had by all.


Thursday, February 23, 2012

Snowdrops in Winter


I was over at Catrine's (my food stylist) this afternoon, rummaging about her yard for rocks (don't ask), when I stumbled across a little patch of snowdrops, pushing up through the leaves and pine needles. It's February mind you. In Boston. Last year at this time we under five or six feet of snow. But snowdrops? Funny how you bitch about the snow when it's here and yearn for it when it's not.

I may take Sadie out to the garden this weekend and plant peas.

Thursday, October 6, 2011

Death and Transfiguration


Thursday, September 29, 2011

Bina Osteria for Boston Magazine


Tuesday, September 27, 2011

A Portrait of the Artist


Saturday, July 16, 2011

Cherry Grappa Jam


I'd been waiting all winter for the fruits of spring so that I could make something other than marmalade and I really had my sights set on strawberry season. I envisioned a bucolic day of picking at a farm with the girls, but somewhere between diapers and tantrums and tears, it just blew right by. That left me scrambling. Luckily, I caught the tail end of cherry season. After a consultation with the Blue Chair Jam Cookbook, I came up a concoction with grappa, star anise and cherry pit kernels. Cracking cherry pits is about as tedious a task as you can imagine, but Rachel swore it was worth it. And since this is one the best jams I've ever had, I'm not about to start arguing. Cherries macerated in grappa is what they do in Italy so that seems like a good enough excuse to me.


Cherry Grappa Jam
modified from The Blue Chair Jam Cookbook

3 pounds plus 1 pound pitted red cherries, pits reserved
1 3/4 pounds plus 7 ounces white cane sugar
6 ounces strained freshly squeezed lemon juice
2 ounces grappa
2 star anise

approximate yield: five 8-ounce jars

Place the cherry pits on the ground or a heavy, solid counter, between two clean towels and tap them with a hammer until they crack. Carefully remove the tiny almond-like kernel from each pit until you have enough kernels to to make 1 tablespoon coarsely chopped. Discard the shells and remaining pits. Place the chopped kernels and the star anise into a fine-mesh stainless-steel tea infuser with a firm latch and set aside.

Place a saucer with five metal teaspoons in a flat place in your freezer for testing the jam later.

Place your perfectly clean jars and lids in a preheated 250˚ oven.

Combine 3 pounds of the cherries with 1 3/4 pounds of the sugar in a large heatproof mixing bowl. In a glass measuring cup, combine the lemon juice and the grappa and set aside.

Place the remaining 1 pound of cherries and 7 ounces of sugar, along with 2 ounces of water, in an 11- or 12-quart copper preserving pan or wide non-reactive kettle. Cook over low heat, stirring constantly with a heatproof rubber spatula and inching the heat gradually up to medium, until the mixture boils, then cook 7 minutes more, or until the cherries have shriveled and the liquid has become thick and syrupy. Immediately pour the hot cherries into a metal strainer over the bowl with the raw cherries and sugar, pressing down on the cooked fruit and draining until every last drop of liquid goes through. Discard the cooked cherries. Add half the lemon juice/grappa mixture to the uncooked cherry mixture, stir well to combine, and transfer the mixture back to your copper preserving pan. Place the mesh tea infuser into the mixture, pressing down on it to be sure it has submerged.

Bring the mixture to a boil over medium heat, gradually increasing the heat to high. Boil rapidly, stirring every minute or two with a heatproof rubber spatula, for 10 to 15 minutes. Monitor the heat closely as you stir; if the jam begins to stick, decrease the heat slightly. Between stirrings, use a stainless steel spoon to skim the foam carefully off the top of the mixture. After 10 to 15 minutes, remove from the heat. Do not stir. Let the mixture rest for a moment, then carefully scrape all the white foam off the top of the mixture and discard. Stir in the remaining lemon juice/grappa mixture. Return the jam to the stove over medium-high heat and continue to cook, stirring frequently. If necessary, gradually lower the heat to prevent scorching.

After 5 more minutes, your jam should be close to ready. To test for doneness, remove the jam from the heat. Do not stir. Carefully transfer a small representative half-spoonful of jam to one of your frozen spoons. Replace the spoon in the freezer for 3 to 4 minutes, then remove and carefully feel the underside of the spoon. It should be neither warm nor cold; if still warm, return to the freezer for a moment. Tilt the spoon vertically to see whether the jam runs; if it is reluctant to run, and if it has thickened to a near-jelly consistency, it is done. If it runs very quickly, cook it another few minutes, stirring, and test again as needed.

When the jam is done, remove the mesh tea infuser and pour into your preheated jam jars. Screw the lids on, not overly tight, and put back into the oven for another 15 minutes to ensure they are completely sterilized.

Remove from the oven and let the jars cool overnight on a steel cooling rack.


Tuesday, May 31, 2011

Honey toast & Iced coffee


Since returning from the Dominican Republic, I've been thinking about the tropics and the trips I took to SE Asia and an iced coffee is like Proust's madeleine–it invariably makes me think of Cambodia. Drifting back over the better part of 12 years into the wet, heavy heat and the pungent, indecipherable smells and the sad, brown, beautiful faces.
The morning was the only time of the day that was comfortable. My moto driver, Koy, would pick me up before first light and we would sail through the cool morning air towards Angkor. The routine was always the same–honey toast and iced coffee in the massive grove of trees that face the main entrance to Angkor Wat. Most days we would drive on again to another temple further away–Banteay Srei or the Bayon or any of the dozens of other temples hidden in the jungle–but always toast and coffee in the growing light and heat in front of Angkor Wat. Once or twice I would let Koy sit on with his moto friends and walk off, alone, in the rising light over the causeway into Angkor Wat, the air alive and dancing with a million dragon flies. Perhaps pausing in the arcades of the second or third level as a massive thunder storm dropped all the heat and humidity and rain which the air could no longer hold. And then climbing again, through the concentric levels of the temple, ascending faster and steeper into the soaring central sanctuary and finally looking out over the thick, green landscape and the strange, dense, white noise of cicadas and birds rising up out of thin, evaporating mists.


But after days and days of temples, I told Koy I wanted to go out into the countryside, to see the people–to see the real Cambodia. He leaped at the idea, said it was what he had always desired to do but that his clients only wanted the temples. Thus began one of the great turning points in my photography–shooting people. We would see the most amazing and beautiful people: a shirtless grandfather holding the tiny hand of his grandchild, young boys fishing with curving, sculptured traps, women with huge bundles of kindling on their heads, walking down the road in peaceful resignation. And for the first time I had the nerve and courage to stop people, to proactively make the picture. Up to that point, my photography, much like my personality, was invisible–like a fly on the wall. Taking a picture was simply the choosing of a moment or a view of which I couldn't interfere–to some degree wasn't even present for. But out in the endless, exposed, flat expanses of rice paddies and floodplain surrounding Angkor, I began to fall in love with photographing people. Just a twin-lens Rolleiflex, a pocket full of Tri-X and the courage to stop a stranger, move them, arrange them–to create an image rather than just taking a snap.

Tuesday, May 24, 2011

The Cacao Road


My conception of this blog, from the beginning, was to be a window into and an outlet for the things that go on in my life outside of being a professional photographer
- cooking, gardening and raising two kids. In my mind they're co-mingled anyway. Most photographers, of course, use their blogs as a marketing tool–marketing in the social mediasphere. That seemed a little redundant (what's the point of the website?) and I'm admittedly not the most social media savvy person in the world.

But I'm just back from a truly amazing trip to the Dominican Republic with Alex Whitmore of Taza Chocolate and I thought, what the hell, let's mediasphere this sucker. I've been shooting for Taza for many years now and think we all realized, at some point, that the growers and producers of the cacao beans was about all we were missing to tell the complete story - from "bean-to-bar" as they say.

A special shout-out to Alex for making it all happen and assisting me in my attempt to drink all the ice-cold Presidentes in the western Dominican Republic. And to Kate Cavallin and Emily Stone for much the same reasons. Lastly to all the farmers and cacao plant workers who were unfailingly kind and patient and generous.


Sunday, April 3, 2011

One Last Gingerbread


It snowed again. I couldn't believe that one. I had to go digging in the back of the coat closet to find my Sorrel boots and ski gloves so that I could go outside and shovel. I swear to God I've shoveled enough snow this winter to cover a small state, like Rhode Island or West Virginia. So you can imagine my frustrated surprise and smoldering anger as I banged around the basement trying to remember where I had put the snow shovels. Of course I've already planted the peas and fava beans, which should both be fine. But the patch of spring mesclun mix that's just beginning to germinate-is that going to make it? I'm about to fly into a gardener's rage. Are gardeners supposed to fly into rages? I'll wind up in gardener's anger management:

"My name is Michael and I began yelling at the garden in 2011. No, wait–it was 2010 with the Japanese garden beetles and the cut-worms. Or was it 2009 and the lead-contamination in the soil?" Then an elderly lady in a wide-brimmed straw hat and canvas tool-apron leans over and gives me a long, firm hug of support.

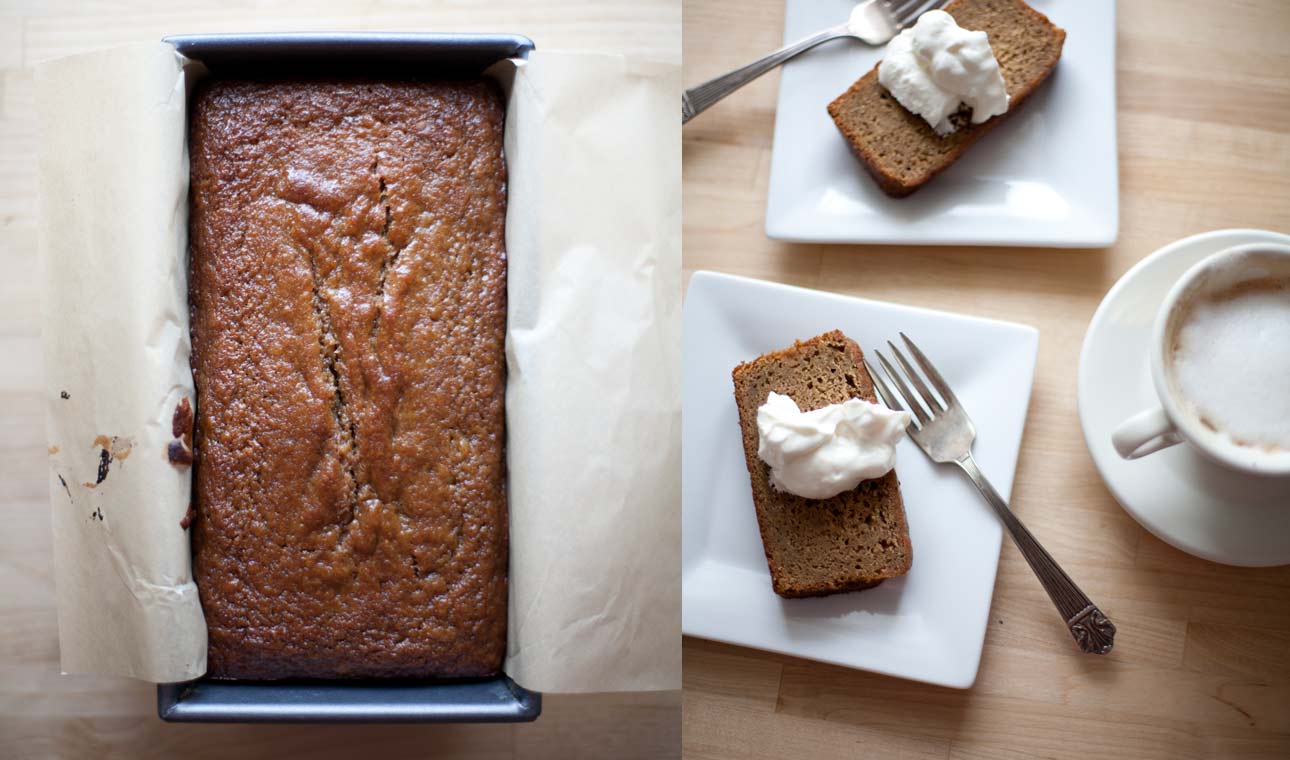
If it's going to keep snowing then I'm making gingerbread and that's all there is to it. I've got all these apples left over from a photo shoot, so it's going to be an apple-ginger bread. Try and stop me.


Apple-Ginger Bread
adapted from Martha Stewart's Baking Handbook

1/3 cup sugar
1 1/2 pounds (about 4) apples, peeled, cored and cut into chunks
2 teaspoons fresh lemon juice

2 sticks (1 cup) unsalted butter @ room temperature
3 1/4 cups all-purpose flour
2 teaspoons baking powder
1/2 teaspoon baking soda
1/2 teaspoon salt
1/2 teaspoon ground cinnamon
1/4 teaspoon ground allspice
1/4 teaspoon ground ginger
1 tablespoon micro-planed fresh ginger
1/2 cup milk
1 teaspoon pure vanilla extract
1/4 cup molasses
4 large eggs

In a medium saucepan, combine the 1/3 cup sugar, lemon juice and apple chunks and cook over medium heat until the apples break down (5-10 minutes). Cover and continue to cook another 5 to 10 minutes until the whole thing looks like applesauce. Let cool.

Preheat the oven to 350˚

Butter 2 loaf pans and line with parchment paper.

Into a medium bowl, sift together the flour, baking powder, baking soda, salt and all the dry spices.

Into a small bowl, combine the milk, vanilla.

In the bowl of an electric mixer fitted with the paddle attachment, beat the butter, 1 3/4 cups sugar, molasses and fresh ginger on medium-high speed until light and fluffy, scraping down the sides as needed. Add the eggs, one at a time, beating for 1 minute after each addition.

With the mixer on low speed, add the flour mixture in three parts, alternating with the milk mixture; beat until just combined after each addition, being careful not to overmix. Add the applesauce and mix to combine again.

Divide the batter between the two loaf pans and bake until a skewer or cake tester comes out clean - approximately 45 minutes to an hour. Cool on a wire rack for 20 minutes and then run a knife around the edges and invert the pans to release the loafs. Let the loafs cool completely before slicing (if you can wait).


Wednesday, February 23, 2011

Bitter Marmalade and English Tea


I worked for a Scottish photographer in New York many years ago who summarized the difference between the Americans and the English with the simple observations that Americans had better teeth but the English made a better cup of tea. He attributed the former to better health care and the latter, I think, to superior character. Anthony Burgess puts it more bluntly: "The Americans, just like the French, do not know how to make tea." In all the time that I worked at this photographer's studio there was nothing in the manner or technique of his preparation that spoke of some mystical art or tea freemasonry – hot water from an electric kettle and a standard-issue bag of one's tea of choice dunked into a Crate-and-Barrel mug. Was I missing something? I always chose Earl Grey which he pronounced with wry, mocking authority to be for "old ladies." And then there's milk and sugar. Did the English use milk but the Chinese didn't? Or was it the other way around? Did anybody use sugar or was that the sure sign of a rube? I despaired of ever being able to make a proper cup of tea.

But I've been on a bit of a marmalade-making binge lately. So sooner or later you find yourself hankering for a cup of tea. And not just any tea – English tea. "But what is English tea?", I ask myself. What makes it English? They certainly don't grow any tea in England. English Breakfast Tea?

As it turns out, English tea is fermented black tea from India (or Ceylan.) Back in the good old days, when the sun never set on the British Empire, they tried a number of tactics to get the Chinese to supply their growing appetite for tea – coercion, infiltration, addiction and finally armed conflict. In the end they decided to eliminate the middle-man and just plant tea in India instead. They owned it after all.
The stronger, darker tea went well with sweeter foods and its bitterness could stand a little "milk and sugar", as opposed to the lighter more elegant green teas drunk in China and Japan.

Whichever way you look at it, it goes great with marmalade.


Orange Campari Marmalade
adapted from The Blue Chair Jam Cookbook

I've been enjoying a Campari and soda in the evenings lately – always with a slice of orange. The bitter and the slightly sweet really hits a spot deep in my Italian soul. So once I started thinking about making Rachel's Bitter Orange & Cinnamon Marmalade I couldn't get the idea of adding Campari out of my head. Luckily she has a lemon marmalade recipe that uses limoncello which I took as her blessing. I substituted cardamom for the cinnamon because I'll add it to anything I can reasonably get away with. I can honestly say this is the best damn marmalade I've ever had in my life - hats off to Rachel Saunders. Special thanks to the folks at Blue Chair for letting me reprint this recipe almost verbatim.

1 1/4 pounds Seville oranges, cut into eighths
3/4 pound lemons (preferably Lisbon), cut into eighths
2 3/4 pounds seeded Seville or other sour oranges, halved crosswise
each half cut lengthwise into quarters and sliced thinly crosswise
4 pounds white cane sugar
3 to 4 extra Seville oranges, to make 6 ounces strained freshly squeezed juice
1/4 cup Campari
1 1/2 tablespoons green cardamom pods, crushed lightly in a mortar to release their seeds

Makes approximately twelve 8-ounce jars

Day 1
Prepare the cooked citrus juice: Place the orange and lemon eighths in a large nonreactive saucepan. Add enough water to cover the fruit by 1 inch. Bring the fruit to a boil over high heat, then decrease the heat to medium. Cook at a lively simmer, covered, for 3 hours, or until the fruit is very soft and the liquid has become slightly syrupy. As the oranges and lemons cook, press down on them gently with a spoon every 30 minutes or so, adding a little more water if necessary. The water level should stay consistently high enough for the fruit to remain submerged as it cooks.

When the oranges and lemons are finished cooking, strain their juice by pouring the hot fruit and liquid into a medium strainer or colander suspended over a heatproof storage container or nonreactive saucepan. Cover the entire setup well with plastic wrap and let drip overnight at room temperature.

Meanwhile, prepare the thinly sliced oranges. Place the slices in a wide stainless-steel kettle and cover amply with cold water. Bring to a boil over high heat, then decrease the heat and cook at a lively simmer for 5 minutes. Drain, discarding the liquid. Return the orange slices to the kettle and cover with 1 inch of cold water. Bring to a boil over high heat, then decrease the heat to medium and cook, covered, at a lively simmer for 2 hours, or until the fruit is very tender. As the fruit cooks, stir it gently every 30 minutes or so, adding a little water if necessary. The water level should stay high enough for the fruit to remain submerged as it cooks. Remove the pan from the heat, cover tightly, and let rest overnight at room temperature.

Day 2
Place a saucer with five metal teaspoons in a flat place in your freezer for testing the marmalade later.

Place your perfectly clean jars and lids on a baking sheet and put into a 250˚ oven to sterilize while you finish the marmalade.

Remove the plastic wrap from the orange and lemon eighths and their juice and discard the fruit. Strain the juice well enough through very fine-mesh strainer to remove any lingering solids.

In a large mixing bowl, combine the sugar, cooked citrus juice, fresh orange juice, the Campari, and the orange slices and their liquid, stirring well.
Transfer the mixture to an 11- or 12-quart copper preserving pan or wide nonreactive kettle. Place the cardamom into a fine-mesh stainless-steel tea infuser with a firm latch and add to the mixture, pressing down on it to be sure it is submerged.

Bring the mixture to boil over high heat. Cook at a rapid boil over high heat until the setting point is reached; this will take a minimum of 20 minutes, but may take longer depending on your individual stove and pan. Initially, the mixture will bubble gently for several minutes; then, as more moisture cooks out of it and its sugar concentration increases, it will start to foam. Do not stir it at all during the initial bubbling; then, once it starts to foam, stir it gently every few minutes with a heatproof rubber spatula. As it gets close to being done, stir it slowly every minute or two to prevent burning, decreasing the heat a tiny bit if necessary. The marmalade is ready for testing when its color darkens and its bubbles become very small.

To test the marmalade for doneness, remove it from the heat and carefully transfer a small representative half-spoonful to one of your frozen spoons. It should look shiny, with tiny bubbles throughout. Replace the spoon in the freezer for 3 or 4 minutes, then remove and carefully feel the underside of the spoon. It should be neither warm nor cold; if still warm, return it to the freezer for a moment. Tilt the spoon vertically to see if it runs; if it does not run, and if its top layer has thickened to a jelly consistency, it is done. If it runs, cook it for another few minutes, stirring and test again as needed.

When the marmalade is finished cooking, turn off the heat but do not stir. Remove the tea-infuser. Using a stainless steel spoon, skin off any surface foam and discard. Pour the marmalade into the preheated, sterilized jars. Wipe the rims clean and screw the lids on just until they are snug and put the whole lot back into the 250˚ oven for 15 minutes to ensure they are sterilized, then set aside to cool.