skip to main |
skip to sidebar

I'd been waiting all winter for the fruits of spring so that I could make something other than marmalade and I really had my sights set on strawberry season. I envisioned a bucolic day of picking at a farm with the girls, but somewhere between diapers and tantrums and tears, it just blew right by. That left me scrambling. Luckily, I caught the tail end of cherry season. After a consultation with the Blue Chair Jam Cookbook, I came up a concoction with grappa, star anise and cherry pit kernels. Cracking cherry pits is about as tedious a task as you can imagine, but Rachel swore it was worth it. And since this is one the best jams I've ever had, I'm not about to start arguing. Cherries macerated in grappa is what they do in Italy so that seems like a good enough excuse to me.


Cherry Grappa Jam
modified from The Blue Chair Jam Cookbook
3 pounds plus 1 pound pitted red cherries, pits reserved
1 3/4 pounds plus 7 ounces white cane sugar
6 ounces strained freshly squeezed lemon juice
2 ounces grappa
2 star anise
approximate yield: five 8-ounce jars
Place the cherry pits on the ground or a heavy, solid counter, between two clean towels and tap them with a hammer until they crack. Carefully remove the tiny almond-like kernel from each pit until you have enough kernels to to make 1 tablespoon coarsely chopped. Discard the shells and remaining pits. Place the chopped kernels and the star anise into a fine-mesh stainless-steel tea infuser with a firm latch and set aside.
Place a saucer with five metal teaspoons in a flat place in your freezer for testing the jam later.
Place your perfectly clean jars and lids in a preheated 250˚ oven.
Combine 3 pounds of the cherries with 1 3/4 pounds of the sugar in a large heatproof mixing bowl. In a glass measuring cup, combine the lemon juice and the grappa and set aside.
Place the remaining 1 pound of cherries and 7 ounces of sugar, along with 2 ounces of water, in an 11- or 12-quart copper preserving pan or wide non-reactive kettle. Cook over low heat, stirring constantly with a heatproof rubber spatula and inching the heat gradually up to medium, until the mixture boils, then cook 7 minutes more, or until the cherries have shriveled and the liquid has become thick and syrupy. Immediately pour the hot cherries into a metal strainer over the bowl with the raw cherries and sugar, pressing down on the cooked fruit and draining until every last drop of liquid goes through. Discard the cooked cherries. Add half the lemon juice/grappa mixture to the uncooked cherry mixture, stir well to combine, and transfer the mixture back to your copper preserving pan. Place the mesh tea infuser into the mixture, pressing down on it to be sure it has submerged.
Bring the mixture to a boil over medium heat, gradually increasing the heat to high. Boil rapidly, stirring every minute or two with a heatproof rubber spatula, for 10 to 15 minutes. Monitor the heat closely as you stir; if the jam begins to stick, decrease the heat slightly. Between stirrings, use a stainless steel spoon to skim the foam carefully off the top of the mixture. After 10 to 15 minutes, remove from the heat. Do not stir. Let the mixture rest for a moment, then carefully scrape all the white foam off the top of the mixture and discard. Stir in the remaining lemon juice/grappa mixture. Return the jam to the stove over medium-high heat and continue to cook, stirring frequently. If necessary, gradually lower the heat to prevent scorching.
After 5 more minutes, your jam should be close to ready. To test for doneness, remove the jam from the heat. Do not stir. Carefully transfer a small representative half-spoonful of jam to one of your frozen spoons. Replace the spoon in the freezer for 3 to 4 minutes, then remove and carefully feel the underside of the spoon. It should be neither warm nor cold; if still warm, return to the freezer for a moment. Tilt the spoon vertically to see whether the jam runs; if it is reluctant to run, and if it has thickened to a near-jelly consistency, it is done. If it runs very quickly, cook it another few minutes, stirring, and test again as needed.
When the jam is done, remove the mesh tea infuser and pour into your preheated jam jars. Screw the lids on, not overly tight, and put back into the oven for another 15 minutes to ensure they are completely sterilized.
Remove from the oven and let the jars cool overnight on a steel cooling rack.
 Since returning from the Dominican Republic, I've been thinking about the tropics and the trips I took to SE Asia and an iced coffee is like Proust's madeleine–it invariably makes me think of Cambodia. Drifting back over the better part of 12 years into the wet, heavy heat and the pungent, indecipherable smells and the sad, brown, beautiful faces.
The morning was the only time of the day that was comfortable. My moto driver, Koy, would pick me up before first light and we would sail through the cool morning air towards Angkor. The routine was always the same–honey toast and iced coffee in the massive grove of trees that face the main entrance to Angkor Wat. Most days we would drive on again to another temple further away–Banteay Srei or the Bayon or any of the dozens of other temples hidden in the jungle–but always toast and coffee in the growing light and heat in front of Angkor Wat. Once or twice I would let Koy sit on with his moto friends and walk off, alone, in the rising light over the causeway into Angkor Wat, the air alive and dancing with a million dragon flies. Perhaps pausing in the arcades of the second or third level as a massive thunder storm dropped all the heat and humidity and rain which the air could no longer hold. And then climbing again, through the concentric levels of the temple, ascending faster and steeper into the soaring central sanctuary and finally looking out over the thick, green landscape and the strange, dense, white noise of cicadas and birds rising up out of thin, evaporating mists.

 But after days and days of temples, I told Koy I wanted to go out into the countryside, to see the people–to see the real Cambodia. He leaped at the idea, said it was what he had always desired to do but that his clients only wanted the temples. Thus began one of the great turning points in my photography–shooting people. We would see the most amazing and beautiful people: a shirtless grandfather holding the tiny hand of his grandchild, young boys fishing with curving, sculptured traps, women with huge bundles of kindling on their heads, walking down the road in peaceful resignation. And for the first time I had the nerve and courage to stop people, to proactively make the picture. Up to that point, my photography, much like my personality, was invisible–like a fly on the wall. Taking a picture was simply the choosing of a moment or a view of which I couldn't interfere–to some degree wasn't even present for. But out in the endless, exposed, flat expanses of rice paddies and floodplain surrounding Angkor, I began to fall in love with photographing people. Just a twin-lens Rolleiflex, a pocket full of Tri-X and the courage to stop a stranger, move them, arrange them–to create an image rather than just taking a snap.

 It snowed again. I couldn't believe that one. I had to go digging in the back of the coat closet to find my Sorrel boots and ski gloves so that I could go outside and shovel. I swear to God I've shoveled enough snow this winter to cover a small state, like Rhode Island or West Virginia. So you can imagine my frustrated surprise and smoldering anger as I banged around the basement trying to remember where I had put the snow shovels. Of course I've already planted the peas and fava beans, which should both be fine. But the patch of spring mesclun mix that's just beginning to germinate-is that going to make it? I'm about to fly into a gardener's rage. Are gardeners supposed to fly into rages? I'll wind up in gardener's anger management:
"My name is Michael and I began yelling at the garden in 2011. No, wait–it was 2010 with the Japanese garden beetles and the cut-worms. Or was it 2009 and the lead-contamination in the soil?" Then an elderly lady in a wide-brimmed straw hat and canvas tool-apron leans over and gives me a long, firm hug of support.
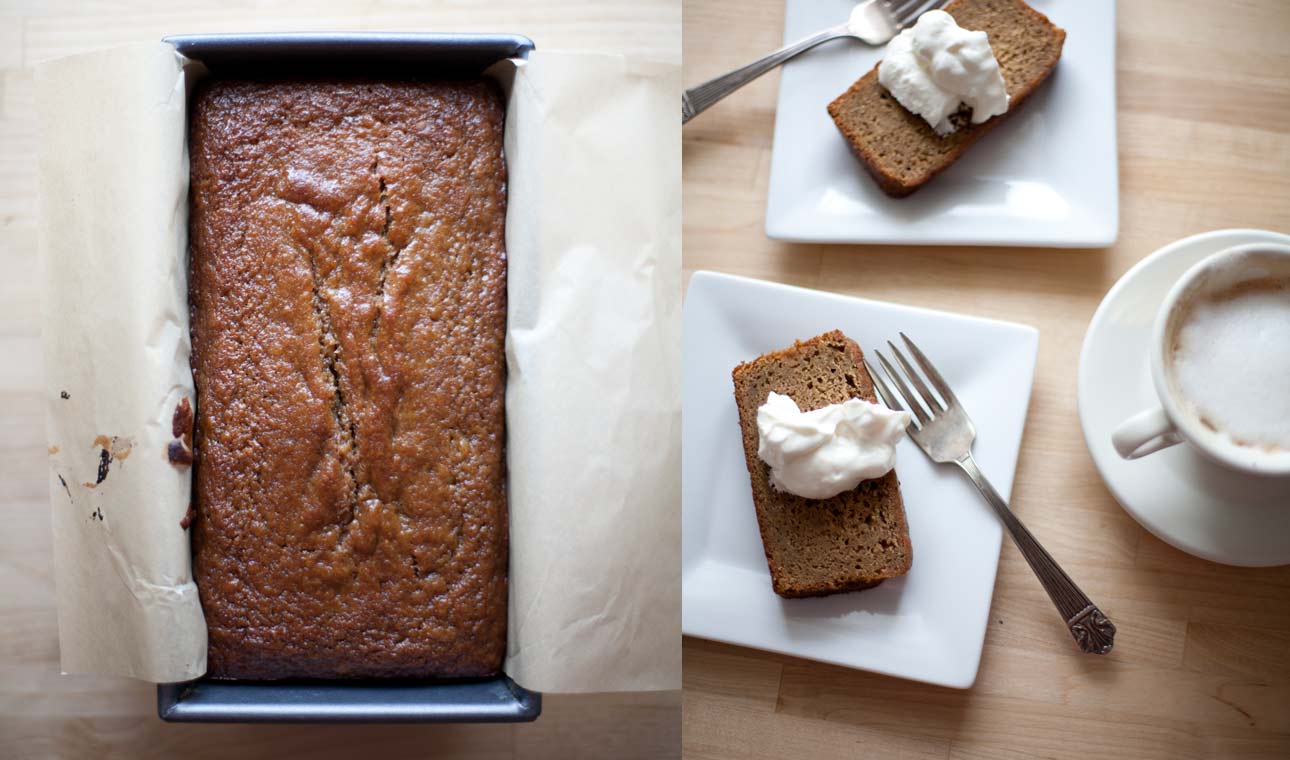
If it's going to keep snowing then I'm making gingerbread and that's all there is to it. I've got all these apples left over from a photo shoot, so it's going to be an apple-ginger bread. Try and stop me.
Apple-Ginger Bread
adapted from Martha Stewart's Baking Handbook
1/3 cup sugar
1 1/2 pounds (about 4) apples, peeled, cored and cut into chunks
2 teaspoons fresh lemon juice
2 sticks (1 cup) unsalted butter @ room temperature
3 1/4 cups all-purpose flour
2 teaspoons baking powder
1/2 teaspoon baking soda
1/2 teaspoon salt
1/2 teaspoon ground cinnamon
1/4 teaspoon ground allspice
1/4 teaspoon ground ginger
1 tablespoon micro-planed fresh ginger
1/2 cup milk
1 teaspoon pure vanilla extract
1/4 cup molasses
4 large eggs
In a medium saucepan, combine the 1/3 cup sugar, lemon juice and apple chunks and cook over medium heat until the apples break down (5-10 minutes). Cover and continue to cook another 5 to 10 minutes until the whole thing looks like applesauce. Let cool.
Preheat the oven to 350˚
Butter 2 loaf pans and line with parchment paper.
Into a medium bowl, sift together the flour, baking powder, baking soda, salt and all the dry spices.
Into a small bowl, combine the milk, vanilla.
In the bowl of an electric mixer fitted with the paddle attachment, beat the butter, 1 3/4 cups sugar, molasses and fresh ginger on medium-high speed until light and fluffy, scraping down the sides as needed. Add the eggs, one at a time, beating for 1 minute after each addition.
With the mixer on low speed, add the flour mixture in three parts, alternating with the milk mixture; beat until just combined after each addition, being careful not to overmix. Add the applesauce and mix to combine again.
Divide the batter between the two loaf pans and bake until a skewer or cake tester comes out clean - approximately 45 minutes to an hour. Cool on a wire rack for 20 minutes and then run a knife around the edges and invert the pans to release the loafs. Let the loafs cool completely before slicing (if you can wait).



 Posts
Posts


